Nymphing - Fly Recipes
Nymph Fly Patterns: Recipes and Tying Tutorials
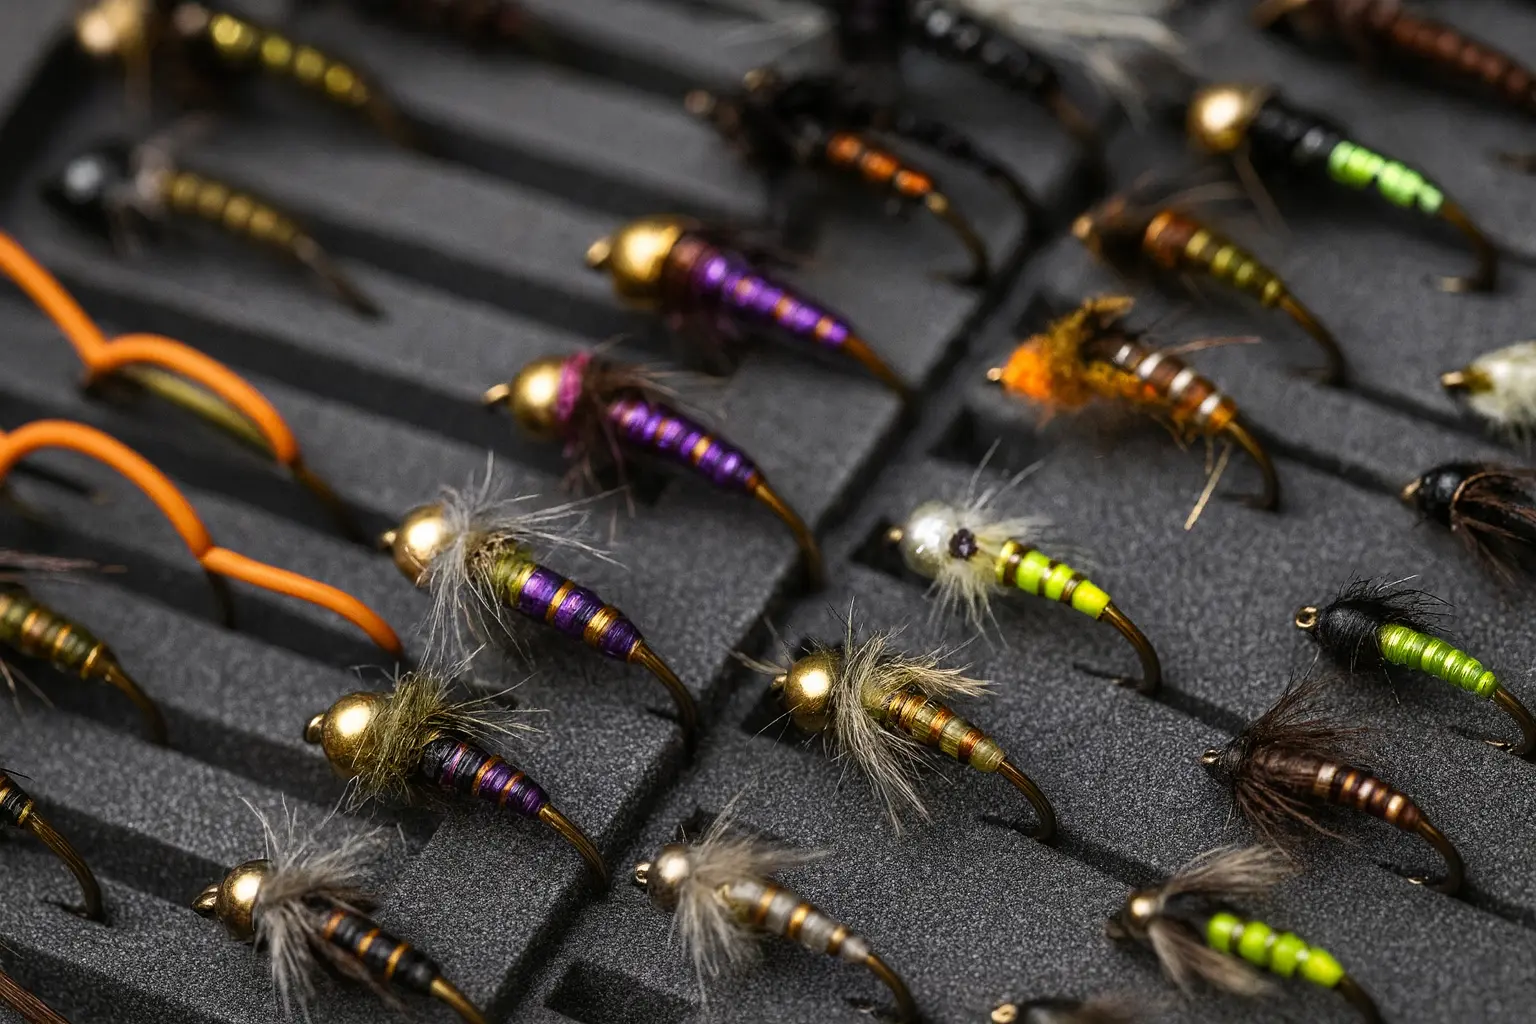
Nymph flies are essential in fly fishing, effectively imitating the immature stages of aquatic insects. Below are five popular nymph patterns, each with its tying recipe, a step-by-step text tutorial, and a video tutorial to guide you through the tying process.
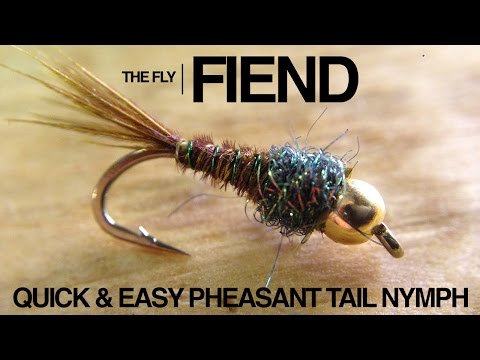
1. Pheasant Tail Nymph
Recipe:
- Hook: Nymph hook, sizes 12-20
- Thread: Brown or black, 8/0
- Tail: Pheasant tail fibers
- Ribbing: Fine copper wire
- Body: Pheasant tail fibers
- Thorax: Peacock herl
- Wing Case: Pheasant tail fibers
Text Tutorial:
- Thread Base: Start by wrapping the thread onto the hook shank, creating a solid base.
- Tail: Tie in a small bunch of pheasant tail fibers at the bend of the hook to form the tail.
- Ribbing: Secure a piece of fine copper wire at the same point as the tail.
- Body: Wrap the pheasant tail fibers forward to form the body, then secure and trim the excess.
- Ribbing: Counter-wrap the copper wire over the body to segment it, then secure and trim the excess.
- Thorax: Tie in a few strands of peacock herl in front of the body, wrap them to form a thorax, then secure and trim the excess.
- Wing Case: Pull the remaining pheasant tail fibers over the thorax to form the wing case, secure, and trim the excess.
- Finish: Create a small thread head, whip finish, and apply head cement if desired.
Video Tutorial:
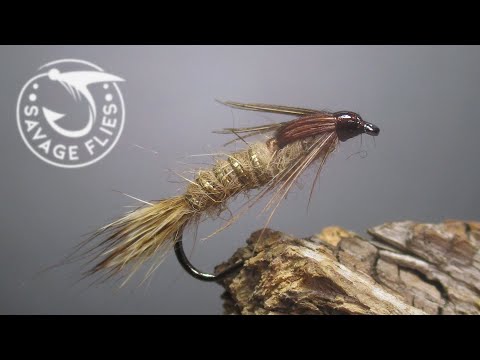
2. Hare's Ear Nymph
Recipe:
- Hook: Nymph hook, sizes 10-16
- Thread: Tan or brown, 8/0
- Tail: Hare's mask fibers
- Ribbing: Gold or copper wire
- Body: Hare's ear dubbing
- Wing Case: Turkey tail or mottled thin skin
- Thorax: Hare's ear dubbing
Text Tutorial:
- Thread Base: Start by wrapping the thread onto the hook shank, creating a solid base.
- Tail: Tie in a small bunch of hare's mask fibers at the bend of the hook to form the tail.
- Ribbing: Secure a piece of gold or copper wire at the same point as the tail.
- Body: Apply hare's ear dubbing to the thread and wrap it forward to form the body.
- Ribbing: Counter-wrap the wire over the body to segment it, then secure and trim the excess.
- Wing Case: Tie in a strip of turkey tail or mottled thin skin over the thorax area.
- Thorax: Apply more hare's ear dubbing to the thread and wrap it to form the thorax.
- Wing Case: Pull the wing case material over the thorax, secure, and trim the excess.
- Finish: Create a small thread head, whip finish, and apply head cement if desired.
Video Tutorial:
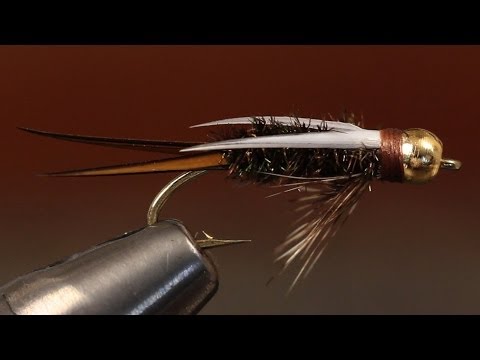
3. Prince Nymph
Recipe:
- Hook: Nymph hook, sizes 10-16
- Thread: Black, 8/0
- Tail: Brown goose biots
- Body: Peacock herl
- Ribbing: Gold or silver wire
- Wing: White goose biots
- Hackle: Brown hen hackle
Text Tutorial:
- Thread Base: Start by wrapping the thread onto the hook shank, creating a solid base.
- Tail: Tie in two brown goose biots at the bend of the hook, splayed outward to form the tail.
- Ribbing: Secure a piece of gold or silver wire at the same point as the tail.
- Body: Tie in several strands of peacock herl, wrap them forward to form the body, then secure and trim the excess.
- Ribbing: Counter-wrap the wire over the body to segment it, then secure and trim the excess.
- Wing: Tie in two white goose biots on top of the hook shank, curving outward to form the wing.
- Hackle: Wrap a brown hen hackle in front of the wing to create a collar, then secure and trim the excess.
- Finish: Create a small thread head, whip finish, and apply head cement if desired.
Video Tutorial:
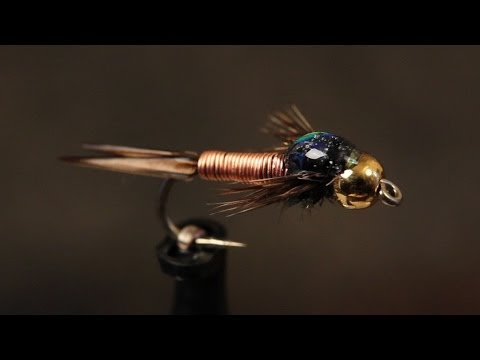
4. Copper John
Recipe:
- Hook: 2X-heavy, 2X-long nymph or streamer hook, sizes 10-20
- Bead: Gold Cyclops bead, size to match hook
- Weight: .015 lead wire
- Thread: Black, 8/0 or 70 denier
- Tail: Brown goose biots
- Abdomen: Copper Ultra Wire, brassie-size
- Wing Case (Top): Pearl Flashabou, saltwater-size
- Wing Case (Bottom): Strip of black Thin Skin, slightly narrower than the width of the hook gap
- Thorax: Peacock herl
- Legs: Speckled brown hen hackle
- Adhesive: 5-minute epoxy
Text Tutorial:
- Bead and Weight: Place the bead onto the hook and secure it in the vise. Wrap lead wire around the shank and push it into the back of the bead to add weight.
- Thread Base: Start the thread behind the lead wraps and secure them in place.
- Tail: Tie in two brown goose biots at the bend of the hook, splayed outward.
- Abdomen: Secure a length of copper wire at the base of the tail and wrap it forward to form a smooth, tapered abdomen. Secure and trim the excess.
- Wing Case: Tie in a strip of black Thin Skin over the abdomen, followed by several strands of pearl Flashabou on top.
- Thorax: Tie in peacock herl and wrap it to form a thorax, then secure and trim the excess.
- Legs: Tie in speckled brown hen hackle fibers on each side of the thorax to represent legs.
- Wing Case Completion: Pull the Flashabou and Thin Skin over the thorax, secure, and trim the excess.
- Finish: Create a small thread head, whip finish, and apply a thin coat of 5-minute epoxy over the wing case for durability.
Video Tutorial:
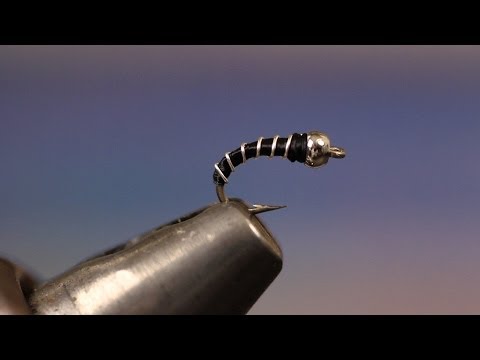
5. Zebra Midge
Recipe:
- Hook: Scud or curved nymph hook, sizes 16-22
- Bead: Silver or gold, sized to match hook
- Thread: Black or red, 8/0
- Ribbing: Fine silver or gold wire
- Body: Thread
Text Tutorial:
- Bead: Place the bead onto the hook and secure it in the vise.
- Thread Base: Start the thread behind the bead and wrap a smooth base down to the bend of the hook.
- Ribbing: Tie in a piece of fine wire at the bend of the hook.
- Body: Wrap the thread forward to create a smooth, tapered body.
- Ribbing: Counter-wrap the wire over the body to create segmentation, then secure and trim the excess.
- Finish: Create a small thread head, whip finish, and apply head cement if desired.
Video Tutorial:
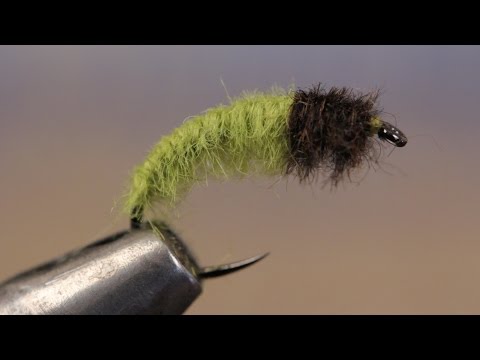
6. Caddis Larva
Recipe:
- Hook: Barbless Tactical Czech Nymph Hook, sizes 14-16
- Thread: UTC Yellow Olive, 8/0 or 70 denier
- Body: Light olive Australian-possum dubbing
- Thorax/Head: Dark brown Australian-possum dubbing
Text Tutorial:
- Thread Base: Start by wrapping the thread onto the hook shank, creating a solid base.
- Body: Apply light olive dubbing to the thread and wrap it forward to form the body, leaving space for the thorax.
- Thorax/Head: Apply dark brown dubbing to the thread and wrap it to form the thorax and head.
- Finish: Create a small thread head, whip finish, and apply head cement if desired.
Video Tutorial:
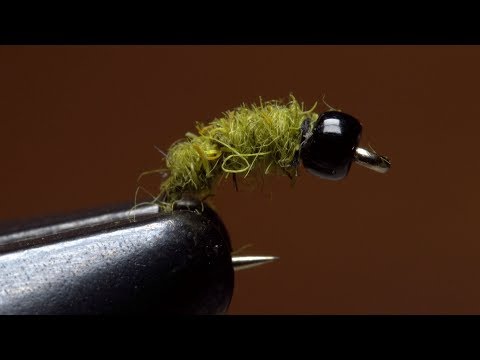
7. Micro Caddis Larva
Recipe:
- Hook: Scud/emerger hook (e.g., Dai-Riki #135), size 22
- Bead: Black opaque glass bead, midge size
- Thread: Black, 16/0 Veevus
- Body: Light olive rabbit-fur dubbing
Text Tutorial:
- Bead: Place the bead onto the hook and secure it in the vise.
- Thread Base: Start the thread behind the bead and wrap a smooth base down to the bend of the hook.
- Body: Apply light olive dubbing to the thread and wrap it forward to form a tapered body.
- Finish: Create a small thread head, whip finish, and apply head cement if desired.
Video Tutorial:

The World's Most Complete Fishing Resource
We're building the ultimate fishing encyclopedia—created by anglers, for anglers. Our articles are created by real experienced fishermen, sometimes using AI-powered research. This helps us try to cover every species, technique, and fishing spot imaginable. While we strive for accuracy, fishing conditions and regulations can change, and some details may become outdated or contain unintentional inaccuracies. AI can sometimes make mistakes with specific details like local access points, parking areas, species distributions, or record sizes.
Spot something off? Whether it's an incorrect boat ramp location, wrong species information, outdated regulations, or any other error, please use the "Help Us Improve This Page" section below. Your local knowledge makes this resource better for every angler.
Explore Related Topics
Discover more articles to deepen your knowledge
Curating articles for you...
Create your own Research Page using AI
Try our AI assistant for free—sign up to access this powerful feature